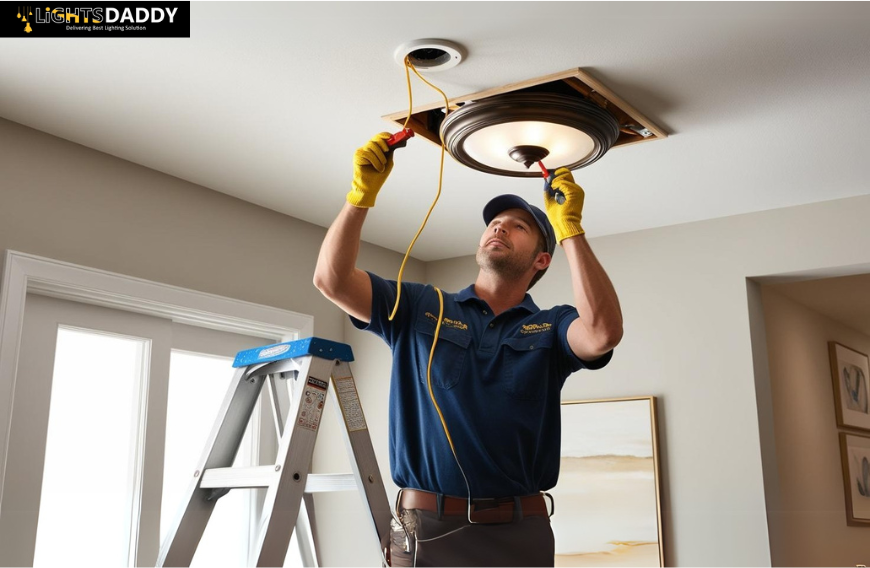
Wiring a light fixture may seem like a job best left to the professionals, but with the right tools, knowledge, and safety precautions, many homeowners can handle the task confidently. Whether you're swapping out an outdated fixture, upgrading to LED lighting, or boosting your home's energy efficiency, understanding lighting fixture wiring is essential for safe and successful installation.
This comprehensive guide will walk you through every step of the process—from the basics of light bulb wiring to the tools you'll need, common pitfalls to avoid, and when it's best to call in a professional. So if you've ever wondered how to wire lights, this is where you begin.
Why Homeowners Take on Lighting Fixture Wiring
There are several reasons homeowners decide to tackle wiring for lights on their own:
-
Aesthetic upgrades: Swapping out old, dated fixtures for modern styles like pendant lighting can dramatically change a room’s look.
-
Energy efficiency: Replacing old incandescent lights with LED fixtures reduces electricity usage.
-
Functionality: Installing new light fixture components such as dimmers or smart switches can improve convenience and control.
-
Cost-saving: Doing the work yourself can save money—if it's done correctly and safely.
Safety Precautions: The Non-Negotiables
Before touching a wire, safety comes first. Improper handling of electrical components can result in injury, fire, or equipment damage. Always follow these key safety steps:
-
Turn off power at the breaker: Locate the correct circuit breaker and shut it off. Never rely on a wall switch alone.
-
Use a voltage tester: Always confirm there’s no live current before working. Test both hot and neutral wires.
-
Insulated tools and safety gear: Use tools with rubber grips, and wear goggles and gloves for added protection.
If your fixture includes advanced or multiple light fixture components, be sure to consult the product's manual and wiring diagram before starting. Many light fixture components come pre-labeled, making the process easier to navigate.
Understanding Electrical Wiring Basics
Getting familiar with basic electrical wiring will make your job safer and more efficient.
Wire Color Codes
-
Black (Hot) – Carries the electrical current from the panel.
-
White (Neutral) – Returns the current to the panel.
-
Green or Bare Copper (Ground) – Acts as a safety path during faults.
Wire Gauge and Circuit Amperage
Choosing the right wire gauge is vital:
-
14-gauge wire: For 15-amp circuits.
-
12-gauge wire: For 20-amp circuits.
To determine amperage, check your circuit breaker—it will be labeled 15A or 20A. Using the wrong gauge can overheat wires and pose a fire risk. This is especially important if you're wiring multiple indoor lights or installing a large fixture. For high-performance options, see indoor lights designed for compatibility with residential electrical systems.
Tools and Materials You'll Need
Before you connect a light fixture, gather these essential tools:
-
Screwdrivers (flat-head and Phillips)
-
Wire stripper/cutter
-
Voltage tester
-
Wire nuts
-
Electrical tape
-
Ladder
-
Work light (if your power is off)
Optional but helpful tools include pliers, cable clamps, and a cordless drill. Having the right tools not only makes your job easier but also helps ensure clean and secure lighting fixture wiring connections.
Step-by-Step: How to Wire Lights Safely
Step 1: Power Off
Turn off the correct breaker and test all wires with a voltage tester.
Step 2: Remove the Old Fixture
Unscrew and gently detach the old light. Disconnect its wires carefully, noting which color connects to which.
Step 3: Inspect the Electrical Box
Check for frayed wires, corrosion, or damage to the box. A solid connection starts with a safe foundation.
Step 4: Match and Connect Wires
-
Black to black (hot)
-
White to white (neutral)
-
Green/bare to green/bare (ground)
If you’re installing outdoor lighting, look for products with weather-resistant seals and wiring sleeves. For durable, high-quality options, browse outdoor lighting designed for long-term exposure.
Step 5: Secure the Connections
Use wire nuts to twist and secure the wires together. Wrap with electrical tape for added hold.
Step 6: Mount the New Fixture
Follow the manufacturer's instructions to attach the fixture to the mounting bracket. Ensure it’s level and firmly attached.
Step 7: Power On and Test
Restore power at the breaker. Flip the switch—your fixture should light up! If not, double-check your connections.
Common Mistakes to Avoid
Even minor mistakes in lighting fixture wiring can lead to big problems. Here's what to steer clear of:
-
Mixing up hot and neutral wires: This can damage your fixture or even cause a short.
-
Overloading the circuit: Too many lights on one circuit can trip breakers or cause overheating.
-
Loose connections: Wires not properly secured can lead to flickering or even fires.
-
Skipping the ground wire: Never leave the ground wire unconnected. It’s essential for safety.
Don’t take shortcuts when learning how to wire lights—they can cost you far more in repairs or risks.
When to Call a Professional
While simple swaps are often DIY-friendly, certain scenarios warrant professional help:
-
Complicated switch setups (e.g., three-way switches or smart lighting systems)
-
Old or ungrounded wiring
-
Upgrading your electrical panel or circuits
-
Any uncertainty at all
Planning something unique like custom neon lights for your game room or signage for a business? You’ll want a proper setup to ensure brightness and safety. For standout style, check out these vibrant neon lights with plug-and-play options.
Final Thoughts
Learning how to wire lights is empowering for any homeowner. From updating a room’s look to improving safety and efficiency, knowing the ins and outs of light bulb wiring opens the door to many DIY possibilities.
But remember—when in doubt, call a licensed electrician. The cost of a mistake is far greater than the price of expertise. Whether you’re replacing a hallway fixture, adding wiring for lights in a new build, or choosing your next aesthetic upgrade, always prioritize safety, follow proper steps, and use the right tools.
Need help choosing the right lights for your space? Browse everything from energy-efficient LEDs to designer-grade pendant lighting to make your next upgrade a bright success.


